libzip is one of the most full-featured and widely-used open source libraries for working with Zip arhives and has been adopted by numerous open source projects as well as commercial products. The library is implemented in C, which also makes it ideal for implementing language-specific bindings.
While its documentation is very comprehensive, I find the descriptions of its various API’s to often be unclear, and there are no examples provided for how various common use cases could be implemented using the library.
One such example is iterating over file entries within a Zip archive. How this could be done is rather non-obvious from reading the documentation, but I was able to find a useful post in the libzip Mailing List Archive on this specific use case.
As a sidenote, the fact that the mailing list archive page is entitled “List Archive”–combined with the fact that there is no search functionality on the website–makes it annoyingly difficult to find information on this topic due to a lot of unrelated mailing list threads showing up in the search results.
In short, this can be achieved using the
zip_get_num_entries and zip_get_name
functions. zip_get_num_entries returns the number of file entries inside the
archive, and then it is possible to fetch the file names of each entry by its
index:
// archive is a zip_t* returned by either zip_open or zip_open_from_source.
zip_64_t num_entries = zip_get_num_entries(archive, /*flags=*/0);
for (zip_uint64_t i = 0; i < num_entries; ++i) {
  const char* name = zip_get_name(archive, i, /*flags=*/0);
  if (name == nullptr) {
    // Handle error.
  }
  // Do work with name.
}
Note that the Zip format does not have the concept of “directories” the way that
file systems generally do. Each entry in a Zip archive has a name, and the entry
names would implicitly reflect the “directory structure” in the archive. This
directory structure can then be reconstructed by the program when extracting
the files onto the local file system. Generally, Zip file libraries treat
“directories” within Zip archives as entries with names ending with '/', for
example as described in the javadoc for
java.util.zip.ZipEntry.isDirectory().
I plan to write a few follow-up posts on this topic, including some more details
about how directories are handled for Zip files (such as the libzip
zip_dir_add function and how Zip archive programs use these
entries), the libzip zip_source data structure and its related
API’s, and possibly a few others.
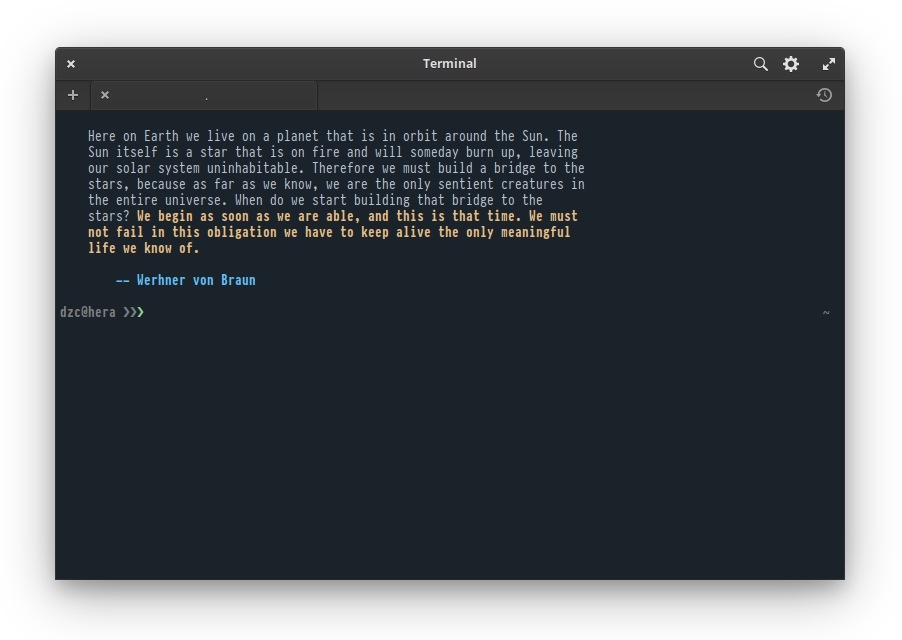
Pantheon Terminal on Elementary OS 5.1 Hera is a fairly simple terminal emulator that focuses on being simple and lightweight. It features three built-in color schemes: a high-contrast light theme, Solarized Light, and a dark theme. Aside from this, it features few other configuration options available in the UI.
However, for those of us power users, being able to customize the terminal color scheme is a must, and ideally, Pantheon Terminal should provide a UI for configuring custom color schemes. There is currently a GitHub Issue on the Pantheon Terminal repository (elementary/terminal#418) for this feature, but in the meantime, there is a workaround for applying a custom color scheme through dconf settings.
There are four main dconf settings under /io/elementary/terminal/settings for
configuring the color scheme:
gsettings set io.elementary.terminal.settings background "$BACKGROUND"
gsettings set io.elementary.terminal.settings foreground "$FOREGROUND"
gsettings set io.elementary.terminal.settings cursor-color "$CURSOR"
gsettings set io.elementary.terminal.settings palette "$PALETTE"
Color values can be expressed in either hex or rgba color values as described in the Colors section in the GNOME GTK+ Style Sheets documentation (GTK+ adopts a number of web technologies for UI layout and styling after all).
The background, foreground, and cursor-color settings are fairly
straightforward and take one color value each. The palette setting takes
a string consisting of color values to override the 0-15 xterm color
ranges, separated by ':' characters. The details of xterm
colors is a topic far beyond the scope of this post, but this StackOverflow
post provides a good overview. In a nutshell, the
colors in this range correspond to the following:
| Normal colors | Bright colors | ||
|---|---|---|---|
| 0 | Black | 8 | Bright Black |
| 1 | Red | 9 | Bright Red |
| 2 | Yellow | 10 | Bright Yellow |
| 3 | Green | 11 | Bright Green |
| 4 | Blue | 12 | Bright Blue |
| 5 | Magenta | 13 | Bright Magenta |
| 6 | Cyan | 14 | Bright Cyan |
| 7 | White | 15 | Bright White |
Thus, the palette setting takes a string of the following format:
"$BLACK:$RED:$GREEN:$ORANGE:$BLUE:$MAGENTA:$CYAN:$WHITE:$BR_BLACK:$BR_RED:$BR_GREEN:$BR_ORANGE:$BR_BLUE:$BR_MAGENTA:$BR_CYAN:$BR_WHITE"
Sidenote 1: One interesting point to note is that hex color values in GTK+ are expressed using Xlib color strings, which are similar in syntax to CSS hex color values. The main difference is that since Xlib uses 16 bits to represent each color component, whereas CSS uses 8 bits. From the Xlib RGB Device String Specification:
The syntax is an initial sharp sign character followed by a numeric specification, in one of the following formats:
#RGB	(4 bits each)
#RRGGBB	(8 bits each)
#RRRGGGBBB	(12 bits each)
#RRRRGGGGBBBB	(16 bits each)
The R, G, and B represent single hexadecimal digits. When fewer than 16 bits each are specified, they represent the most significant bits of the value (unlike the “rgb:” syntax, in which values are scaled). For example, the string “#3a7” is the same as “#3000a0007000”.
Sidenote 2: There is also an additional prefer-dark-style setting, which
is used to enable the dark mode UI for Pantheon Terminal. This is a setting that
isn’t exposed to users currently but can be enabled through the “Prefer dark
variant” setting in elementary-tweaks. There is
ongoing work to implement a system-wide dark mode in Elementary
OS and formalize a standard for dark mode preference across
FreeDesktop.org projects. The dashboard for the Dark Mode project for
Elementary OS can be found here.
To make life easier, I wrote a bash script that makes it easier to specify,
understand, and apply custom color schemes for Pantheon Terminal. As a dark mode
aficionado, I also have prefer-dark-style enabled:
#!/bin/bash

set -euf -o pipefail

readonly BLACK="#1B232A"      # black    terminal_color_0
readonly RED="#D95468"        # red      terminal_color_1
readonly GREEN="#8BD49C"      # green    terminal_color_2
readonly ORANGE="#D98E48"     # orange   terminal_color_3
readonly BLUE="#539AFC"       # blue     terminal_color_4
readonly MAGENTA="#B62D65"    # magenta  terminal_color_5
readonly CYAN="#008B94"       # cyan     terminal_color_6
readonly WHITE="#718CA1"      # white    terminal_color_7

readonly BR_BLACK="#333F4A"   # bright black    terminal_color_8
readonly BR_RED="#D95468"     # bright red      terminal_color_9
readonly BR_GREEN="#8BD49C"   # bright green    terminal_color_10
readonly BR_ORANGE="#EBBF83"  # bright orange   terminal_color_11
readonly BR_BLUE="#5EC4FF"    # bright blue     terminal_color_12
readonly BR_MAGENTA="#B62D65" # bright magenta  terminal_color_13
readonly BR_CYAN="#70E1E8"    # bright cyan     terminal_color_14
readonly BR_WHITE="#B7C5D3"   # bright white    terminal_color_15

readonly BACKGROUND="$BLACK"
readonly FOREGROUND="$BR_WHITE"
readonly CURSOR="$BLUE"
readonly DARKSTYLE='true'
readonly PALETTE="$BLACK:$RED:$GREEN:$ORANGE:$BLUE:$MAGENTA:$CYAN:$WHITE:$BR_BLACK:$BR_RED:$BR_GREEN:$BR_ORANGE:$BR_BLUE:$BR_MAGENTA:$BR_CYAN:$BR_WHITE"

gsettings set io.elementary.terminal.settings background "$BACKGROUND"
gsettings set io.elementary.terminal.settings foreground "$FOREGROUND"
gsettings set io.elementary.terminal.settings cursor-color "$CURSOR"
gsettings set io.elementary.terminal.settings prefer-dark-style "$DARKSTYLE"
gsettings set io.elementary.terminal.settings palette "$PALETTE"
As a final note, applying these settings will override the current color scheme selected in the Pantheon Terminal settings menu. However, this is not completely persistent, and selecting one of the other color schemes from the menu will override your custom color scheme, and you would need to run the script in order to re-apply your custom color scheme again.
Unlike terminal emulators such as iTerm2 and Terminal.app, GNOME Terminal does not have an easy way to import and export color schemes as files. The closest analogue is via Profiles, which are managed in dconf.
Note that the following is not the most ideal approach. Tools such as Gogh do exist and provide an easy and automated way to apply color schemes to GNOME Terminal, as well as to a number of other terminal emulators. However, for the sake of learning, I think it is still helpful to document some details of how GNOME Terminal profiles are managed, and in the future, I plan to write my own tool to automate this.
As a sidenote, Gogh’s recommended usage is to fetch its shell script and then execute it on your local shell. This is a serious security risk and should always be avoided.
In addition to terminal emulator color schemes, I also have corresponding color schemes for tmux and my go-to text editor vim. Eventually, I plan to write tooling to manage color schemes across all of these.
Importing a GNOME Terminal Profile
This part assumes that you already have a profile exported from GNOME Terminal that contains the color scheme you want to apply. See below for more information on how to do this.
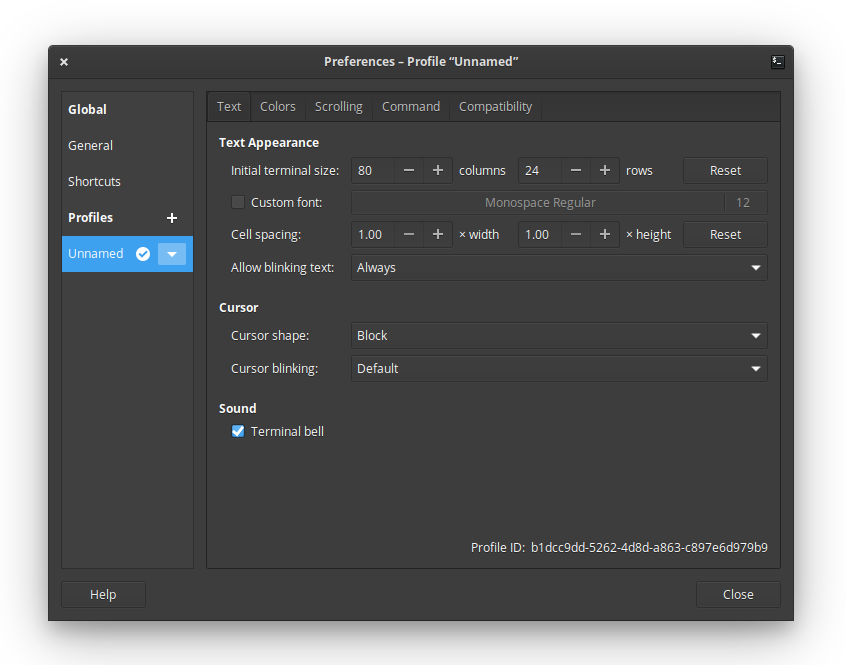
After installing GNOME Terminal on Elementary OS, there is no default profile created, and the only one that exists is an Unnamed profile:
Similarly, running dconf dump /org/gnome/terminal/legacy/profiles:/ returns
no output.
The first step is to create a new default profile. Profiles are identified using a UUID, and the UUID of the default profile is needed in order to import a profile containing your color scheme.
Create a new profile, name it “default”, and set it as the default profile. This step is required before the unnamed profile can be removed. Note that the name of the new profile doesn’t really matter, since once the new profile is imported, it will overwrite the name in addition to other settings, including the colors. Now, delete the unnamed profile.
The dconf dump command will now output the new profile:
$ dconf dump /org/gnome/terminal/legacy/profiles:/
[/]
list=['e27d087d-18c4-4b72-83be-c84103543515']
default='e27d087d-18c4-4b72-83be-c84103543515'

[:e27d087d-18c4-4b72-83be-c84103543515]
visible-name='default'
As shown above, UUID of the new default profile is
e27d087d-18c4-4b72-83be-c84103543515. Now, import your profile file as
follows:
dconf load /org/gnome/terminal/legacy/profiles:/:e27d087d-18c4-4b72-83be-c84103543515/ < citylights-profile.dconf
This command will import the profile’s settings and will also immediately apply its settings and color scheme to any open terminal windows.
Exporting a GNOME Terminal Profile
To export a GNOME Terminal profile, first dump the list of profiles using
dconf dump:
$ dconf dump /org/gnome/terminal/legacy/profiles:/
[/]
list=['e27d087d-18c4-4b72-83be-c84103543515']
default='e27d087d-18c4-4b72-83be-c84103543515'

[:e27d087d-18c4-4b72-83be-c84103543515]
foreground-color='rgb(183,197,211)'
highlight-background-color='rgb(40,70,102)'
visible-name='City Lights'
palette=['rgb(51,63,74)', 'rgb(217,84,104)', 'rgb(139,212,156)', 'rgb(235,191,131)', 'rgb(83,154,252)', 'rgb(182,45,101)', 'rgb(112,225,232)', 'rgb(113,140,161)', 'rgb(65,80,94)', 'rgb(217,84,104)', 'rgb(139,212,156)', 'rgb(247,218,179)', 'rgb(94,196,255)', 'rgb(182,45,101)', 'rgb(112,225,232)', 'rgb(183,197,211)']
cursor-background-color='rgb(73,98,124)'
use-system-font=false
cursor-colors-set=true
highlight-colors-set=true
use-theme-colors=false
use-transparent-background=false
cursor-foreground-color='rgb(73,98,124)'
font='PragmataPro Mono 10'
allow-bold=true
use-theme-transparency=false
bold-color-same-as-fg=true
bold-color='#97979C9CACAC'
background-color='rgb(28,31,39)'
background-transparency-percent=7
cursor-blink-mode='off'
highlight-foreground-color='#'
Note that unlike the output of the same dconf dump command in the previous
section, this command’s output is much more verbose, since the profile now
overrides many of the default settings.
Using the UUID of the profile you want to export (which in this case is
e27d087d-18c4-4b72-83be-c84103543515) dump its settings into a file:
dconf dump /org/gnome/terminal/legacy/profiles:/:e27d087d-18c4-4b72-83be-c84103543515/ > citylights-profile.dconf
This file can in turn be imported using the steps described above.
Elementary OS has become my favorite Linux distribution. The Pantheon desktop environment is unmatched among Linux desktop environments in terms of usability and aesthetics. While earlier versions were rather buggy, the latest version, 5.1 Hera, has become stable enough for daily usage.
Elementary comes with its own terminal emulator, Pantheon Terminal, which, like many other aspects of the distribution, focuses on simplicity. However, I still prefer using GNOME Terminal due to its richer feature set and customizability.
Installing GNOME Terminal on Elementary OS is not as straightforward as installing most other apps–which is mainly done via AppCenter–and takes a few extra steps.
Installing GNOME Terminal
First, install the gnome-terminal package:
sudo apt install gnome-terminal
Although GNOME Terminal is installed, getting it to show up in the Slingshot
app launcher takes an additional step. To do so, open the gnome-terminal
desktop file. This will require root privileges:
sudo vi /usr/share/applications/gnome-terminal.desktop
You can also do this via Files by opening a New Window As Administrator and
navigating to the /usr/share/applications directory.
Make the following two changes:
- Change the name to GNOME Terminal since both terminal emulators are named “Terminal” by default.
- Comment out or remove the line beginning with
OnlyShowIn. This will add GNOME Terminal to Slingshot.
[Desktop Entry]
Name=GNOME Terminal  # <-- Change to GNOME Terminal
Comment=Use the command line
Keywords=shell;prompt;command;commandline;cmd;
TryExec=gnome-terminal
Exec=gnome-terminal
Icon=utilities-terminal
Type=Application
X-GNOME-DocPath=gnome-terminal/index.html
X-GNOME-Bugzilla-Bugzilla=GNOME
X-GNOME-Bugzilla-Product=gnome-terminal
X-GNOME-Bugzilla-Component=BugBuddyBugs
X-GNOME-Bugzilla-Version=3.28.2
Categories=GNOME;GTK;System;TerminalEmulator;
StartupNotify=true
X-GNOME-SingleWindow=false
#OnlyShowIn=GNOME;Unity;  # <-- comment out or remove this line
Actions=new-window
--- snipped ---
Hide menubar by default
To hide the GNOME Terminal menubar by default, first install dconf-tools:
sudo apt install dconf-tools
Open dconf Editor, navigate to /org/gnome/terminal/legacy, and
uncheck default-show-menubar:

The menubar can be toggled by right clicking in the terminal window and selecting “Show Menubar” or via the F10 key.
Add GNOME Terminal Here context menu option
A useful feature is to have an option in the Files right click context menu to
open a GNOME Terminal window in the current directory. To do this, create a
Contractor file for gnome-terminal:
sudo vi /usr/share/contractor/gnome-terminal.contract
Add the following:
[Contractor Entry]
Name=Open GNOME Terminal Here
Icon=
Description=Open in GNOME Terminal
MimeType=inode/directory
Exec=gnome-terminal --working-directory=%u
X-GNOME-Gettext-Domain=contractor
This will add a “Open GNOME Terminal Here” option to the right click menu in Files. Note that this option appears at the bottom of the menu and not under the “Open in” menu, which includes (Pantheon) Terminal by default. It would be nice if there was an easy way to add a GNOME Terminal option there for consistency, but this works well enough for now.
The other day, I was trying to implement a UI widget consisting of a text box containing some text and a button that would automatically copy the contents of the text box into the clipboard, not unlike the ones on GitHub repository pages or, similarly, the code listings on the Bootstrap documentation.
In particular, I wanted the behavior of the button to be the same:
- When hovering over the button, display a tooltip with the message “Copy to Clipboard”
- When the button is clicked and the text is copied,, the message on the tooltip changes to “Copied!”
Creating the textbox itself is easy: simply create a Bootstrap input group consisteing of a text input and a button addon with a tooltip:
<form>
  <div class="input-group">
    <input type="text" class="form-control"
        value="/path/to/foo/bar" placeholder="Some path" id="copy-input">
    <span class="input-group-btn">
      <button class="btn btn-default" type="button" id="copy-button"
          data-toggle="tooltip" data-placement="button"
          title="Copy to Clipboard">
        Copy
      </button>
    </span>
  </div>
</form>
The more involved part is the Javascript that wires everything together. Specifically, we want to do the following:
- When we hover over the copy button, display the tooltip with the original “Copy to Clipboard” message.
- When we click the copy button, copy the contents of the text input into the clipboard.
- Once the contents of the text input are copied, change the tooltip message to “Copied!”
- If we mouse over the button again, the tooltip again displays the original “Copy to Clipboard” message.
First, we need to initialize the tooltip according to Bootstrap’s documentation:
$('#copy-button').tooltip();
That was easy. Next, we need to add a handler for the Copy button that would
copy the contents of the text box into the clipboard. One way we can do this
without using a third-party library is to first use the Selection
API to select the text inside the text box and then execute the
copy command using Document.execCommand() to copy it to the
clipboard. For a detailed explanation, see this documentation.
$('#copy-button').bind('click', function() {
  var input = document.querySelector('#copy-input');
  input.setSelectionRange(0, input.value.length + 1);
  try {
    var success = document.execCommand('copy');
    if (success) {
      // Change tooltip message to "Copied!"
    } else {
      // Handle error. Perhaps change tooltip message to tell user to use Ctrl-c
      // instead.
    }
  } catch (err) {
    // Handle error. Perhaps change tooltip message to tell user to use Ctrl-c
    // instead.
  }
});
Once the text is copied, we also want to update the tooltip message. To do this,
we can trigger a custom copied event to update the tooltip. Let’s we add a
handler to #copy-button to handle a custom event, copied, that contains the
message to display on the tooltip.
$('#copy-button').bind('copied', function(event, message) {
  $(this).attr('title', message)
      .tooltip('fixTitle')
      .tooltip('show')
      .attr('title', "Copy to Clipboard")
      .tooltip('fixTitle');
});
Finally, we update the click handler for #copy-button to trigger copied
events to update the tooltip message. Putting everything together, we have the
following:
$(document).ready(function() {
  // Initialize the tooltip.
  $('#copy-button').tooltip();

  // When the copy button is clicked, select the value of the text box, attempt
  // to execute the copy command, and trigger event to update tooltip message
  // to indicate whether the text was successfully copied.
  $('#copy-button').bind('click', function() {
    var input = document.querySelector('#copy-input');
    input.setSelectionRange(0, input.value.length + 1);
    try {
      var success = document.execCommand('copy');
      if (success) {
        $('#copy-button').trigger('copied', ['Copied!']);
      } else {
        $('#copy-button').trigger('copied', ['Copy with Ctrl-c']);
      }
    } catch (err) {
      $('#copy-button').trigger('copied', ['Copy with Ctrl-c']);
    }
  });

  // Handler for updating the tooltip message.
  $('#copy-button').bind('copied', function(event, message) {
    $(this).attr('title', message)
        .tooltip('fixTitle')
        .tooltip('show')
        .attr('title', "Copy to Clipboard")
        .tooltip('fixTitle');
  });
});
Here is a live demo of this copy-to-clipboard widget in action:
The main downside of this approach is that the copy command is not supported in
Safari. One way to mitigate this is to use
queryCommandSupported and queryCommandEnabled to
check whether the command is supported and fall back gracefully display a
“Copy with Ctrl-c” message on the tooltip instead. In essence, this how the
Clipboard.js library works, except wrapped up in a much more
polished API.
Unfortunately, until the new HTML 5 Cipboard API is finalized and adopted by all major browsers, the only cross-browser way to reliably copy to clipboard is using Flash. This is the approach taken by libraries such as ZeroClipboard, which is, in fact, the library used by GitHub as well as the Bootstrap documentation. Hopefully, once the HTML 5 Clipboard API is available, adding such a simple feature will become much less of a hassle.